Showing posts with label *Before and After*. Show all posts

Tuesday, February 15, 2011

*Before and After* Baby Rags

Newly-binded baby rags!!

I had wanted to jazz up Ella's burp rags for awhile now, especially when she was an infant and I seemed to have one over my shoulder or stuffed in my back pocket at all times!  We didn't get any fancy rags because, well, they are rags after all, made for wiping and cleaning (though used for much more, including stand-in diaper when I was caught without a spare diaper liner...a common casualty of never having a designated baby bag!)  But when Ella was little I was too busy being overwhelmed and slogging through new-mommyhood and didn't have the time/energy/creative brain power to put towards such a trivial thing.  Fast forward a year and Hark! I have time!  (Oh glorious naps - cleaning shmeaning, I'd rather be creating!!)  So I decided to do her baby rags two ways...

Soft baby rags *before*

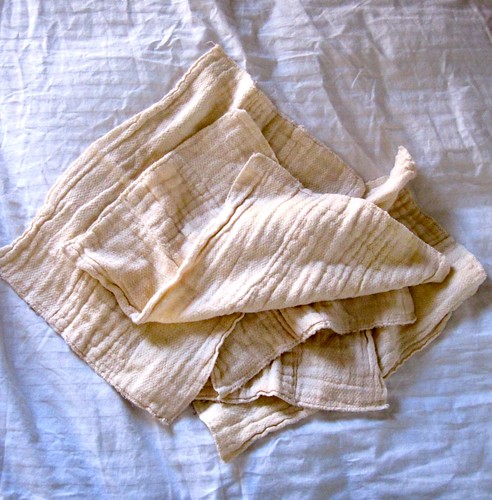
This group of burp cloths are actually organic cotton cloth diapers, a baby gift from some good friends, and with all the washing they have been through, these cloths are super soft!  I didn't want to lessen the usable space, so I decided to make my own (here's a tutorial on how you can too) using pretty fabric scraps. 

Soft baby rags *after*

Pile of pretty rags

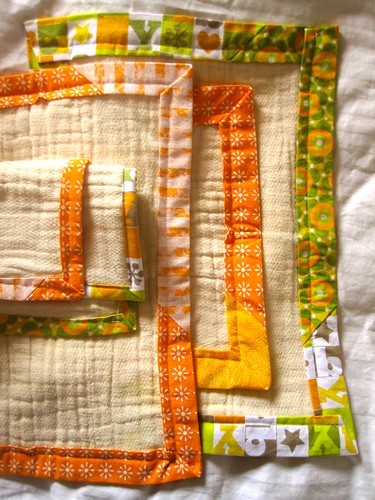
I love love this fabric, especially the flowers, and am happy that it is gender-neutral enough that boy or girl, our next child will be cleaned up in style!!

Utilitarian baby rags *before*

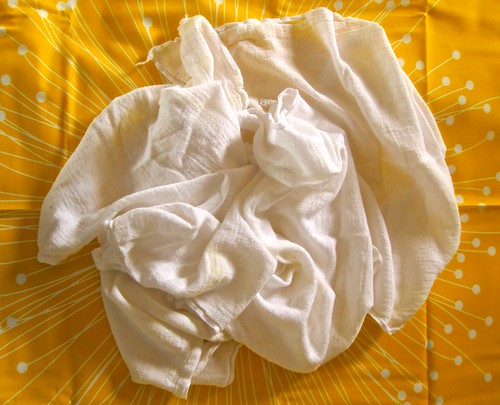
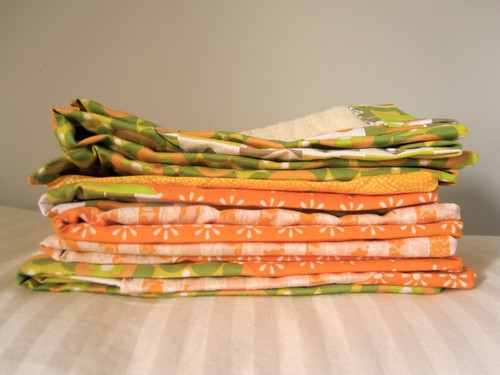
My second group of burp cloths was not so soft - this was my utilitarian bunch that gets the job done.

Utilitarian baby rags *after*

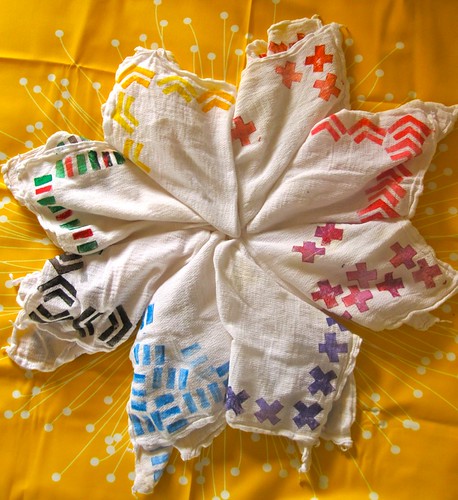
The fabric is thinner and a bit more coarse, as well as a lot less even, so I decided to go the potato-print route.  This had the added bonus of covering existing stains!! 

Utilitarian baby rags prettified!

Pretty potato patterns

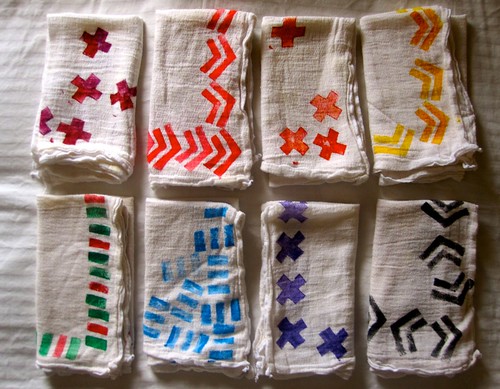
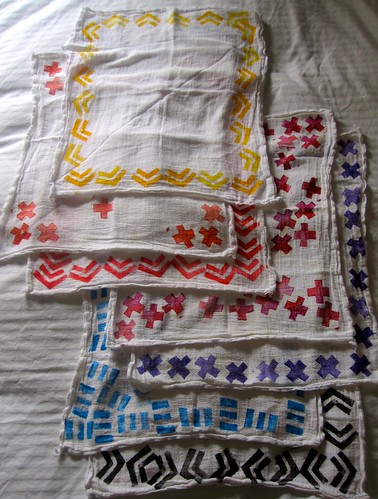
I again tried to keep most of the pattern on the outside, so that the inside portion of the cloth could be used for wiping and what-not. 

Potato prints

Potato prints are easy-peasy, just 1.) cut away the bits of potato you don't want printed and then 2.) dip in a bit of paint and stamp away.  I would recommend a basic design for a greater impact.

The irony of these pretty baby rags is that after I finished, the paint was dry and the pictures taken, I folded them up and put them into storage for our next little one, whenever that may be.  In the meantime, I plan on doing some similar jazzing to my plain white dish towels - FUN!!!

Wednesday, January 26, 2011

*Before & After* Happy Tape Updates

(my happy tape)

Ella's room is a bright place.  Before she was born, I tried to pull together fun things we already had and re-purpose them in her room.  I knew it was a place that she and I would both be spending a chunk of time in, so I wanted to make sure it appealed to us both.  We recently switched rooms (so that she would be warmer at night) and the decorating bug has bitten again!  Now that Ella is older, however, I do not have the luxury of being able to work on something uninterrupted for any amount of time.  Today while Ella entertained herself (for about 15 minutes), I tackled two easy projects that bring more touches of color into her space and a satisfying sense of accomplishment into my day (hey - it's the little things!)  Here's what I did, so you can try it too...
Supplies Needed: 
- Japanese washi (masking) tape (I use Happy Tape, but you could also try This or This)
- Your imagination

If you have 5 minutes...
Have an active little one and not much time?  Go for something smaller with an easy square or rectangle shape.  I decided to spruce up Ella's wipe box.  We refill it with wipes as needed and look at the boring white box every day.

(boring white container)
I chose three colors with a plaid-inspired design.  You don't have to make the back or bottom fancy (unless your object is seen from multiple sides, of course!)  I change a countless number of diapers, this happy shot of color just made it a bit more fun (for me, at least!)


If you have 10-15 minutes...
If you'd like a bit more time, I encourage to strip your little one down and hand 'em a spoon and a cup of applesauce or yogurt - trust me, your kiddo will be busy for awhile!  Now you can tackle something bigger or with a more challenging shape.  Circles are not necessarily hard, you just have to pay attention to make sure your lines are not all over the place and that the tape is smoothed down as well as possible.  I chose to attend to Ella's lamp - plain white, slightly tilted, and with a stain (don't ask, because I don't know!)

(the sad flower clip did little to spruce up this lamp)
This time I used four colors - two dark and two light.  You may want to use more or less than I did, I have a tendency to go overboard, so I focused on pulling back and not overloading the shade with color.  If you do vertical stripes, make sure you connect them on the inside of the shade as well, since it is also visible.  The final look, especially when turned on, is rather Burberry-esque (fun!)


What will you tackle with this fun tape?  Please share, if you do!!

**This would also be a great way to let your older child add a bit of their own design aesthetic into their living spaces, without any mess to speak of!**

Tuesday, November 16, 2010

*Before & After* Painted Step-stool


Last week was the last of our "nice" days (as in warm days).  One afternoon, during Ella's nap, I decided to throw open the windows and redo a step-stool for Ella.  She is getting to the point where she wants to be where I am...all.the.time.  Which will be a bit easier once she's at counter height, rather than knee height!!

(Before - ick!)
Here's the step-stool before.  Lexi and I picked it up in the "returned items" section of Ikea two years ago, and it has been spending most of the time since then outside as a plant stand.  Now it's stained, dirty, yuck.

(After - yay!!)
After giving it a cleaning and light sanding, I whipped out some blue and yellow paint samples and a can of olive green returned paint (as in, the original recipient didn't feel it was quite the right shade). 

The green paint is an indoor/outdoor paint, so that was the first all-over layer.  I then painted the steps blue and edged them in a creamy-yellow. 

For a whimsical touch, I stamped the alphabet on the front of the steps and a few letters on top.

All in all, I'm really happy with how it turned out.  It's a bright touch in our kitchen, and best of all, Ella is now able to see what all the fuss is about during dinner prep!

LinkWithin

Related Posts with Thumbnails